
Routing
Interactive routing: modes, differential pairs, buses, fan-out, teardrops, impedance and length tuning.
- Press X (or the route button) and click a pad, a via, a track end or a free point. The track takes the net of what you started on and its net class width (or the width chosen in the action bar; W / Shift+W cycle the board’s pre-defined widths).
- Move the cursor: the preview follows the line mode (45°, 90° or free; / flips the posture) and is
checked live against other-net copper with the net class clearance (and the custom rules of the
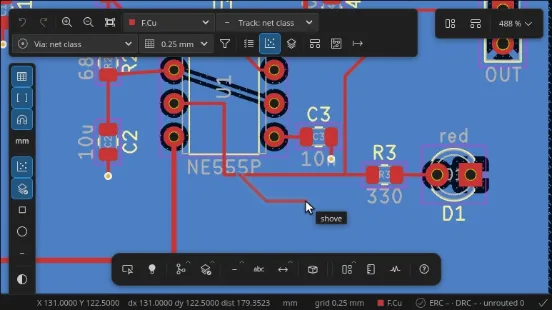
.kicad_dru). The routing mode (Routing options panel,softforge.edsnx.routingMode) chooses what happens on a collision:highlightshows it,walkaround(default) takes the shortest way around the obstacles,shovepushes other tracks and vias aside by their clearance — previewed as ghosts with their clearance halo — and walks around what cannot move (pads, keepouts, locked items). When shove cannot resolve every collision the status line says it fell back to walkaround (or highlight). - Click to fix a corner; the tracks it pushed stay pushed. V places a through via at the cursor (pushing other copper in shove mode) and continues on the other copper layer (the via size comes from the net class or the action bar). Backspace removes the last segment and its pushes spring back.
- Clicking a pad or copper of the same net, Ctrl+click, End or double-click finishes; the segments, vias and any split of the track you started from are one undo step.
Ctrl+Shift+V places stand-alone vias; the net comes from the copper under the cursor. Drag (G/D)
moves a track segment keeping its neighbours attached at their angle; in shove mode it pushes other-net
tracks and vias out of the way. The ratsnest (softforge.edsnx.showRatsnest,
curvedRatsnest) shows what is left to connect, and the status strip counts unrouted connections.
Copper text on a copper layer is an obstacle by its letters, not by its box: the router (and the shover, the autorouters’ DRC self-check and the tuning patterns) sees each glyph stroke of the text at its pen width, so a track may pass between the letters or through the spaces between words. Knockout text stays a solid block.
Routing options and the Route flyout#
The Route flyout on the bottom tool bar holds every routing tool: single track (X), differential pair (6), multi-route (Ctrl+Shift+B), the three length tuners (7, 8, 9), via (Ctrl+Shift+V), fan-out, via stitching, via fence and gloss; the tooltip of each entry names its key.
The Routing panel (right side, or Electronics Designer: Routing Options in the editor title bar ▸ …) sets:
- the router mode (highlight collisions, walkaround, shove), the posture and the corner mode (45°, 90° or rounded; with rounded corners the preview draws the arcs while you route, the same arcs the commit writes as arc tracks);
- track width, via size and diff pair width / gap / via gap, each from net class or an explicit value (kept in step with the action bar dropdowns);
- the bus spacing for multi-routing (clearance, net class, custom or the current pitch);
- the tuning pattern defaults (style, amplitude, spacing, corner radius, single-sided);
- shove options: allow via pushing, jump over vias, iteration limit and time budget.
The options are stored in the softforge.edsnx.routing setting. While a routing tool runs, the panel’s
readouts show the mode, width, gap, spacing, length (and target when tuning), skew and whether the preview is
clean, violating a clearance or blocked.
Dragging tracks#
D starts the drag engine on what is selected, or else on what is under the cursor; G does the same with free angle (KiCad’s Drag 45° and Drag Free Angle). Grabbed near an end, the segment’s corner moves and both legs are re-cornered; grabbed elsewhere, the segment moves along its normal and its neighbours stay attached at their angle (an arc’s bulge follows the cursor). On a via, or on a track end that sits on a via, the via moves with every track ending on it. On several selected parallel segments, the bus moves together and keeps its pitch. A coupled segment of a differential pair drags both traces; footprints, graphics and mixed selections go to the move tool, as in KiCad. Click or Enter places the result as one undo step; Esc cancels.
The conflict mode decides what happens when the dragged copper meets other-net copper:
| Mode | Behaviour |
|---|---|
| Ignore | The copper goes where the cursor is; collisions are shown and placing asks for a confirmation (click or Enter again). |
| Stop at first obstacle | The drag stops at the last position that adds no collision. |
| Walkaround | The dragged run detours around obstacles, with the shortest detour. |
| Hug | As walkaround, the detour hugging the obstacles’ clearance outline. |
| Shove (default) | Other tracks and vias are pushed aside by their clearance; what cannot move holds the drag at its last legal position. |
| Shove + hug | Shove, then hug what cannot be shoved. |
Shift+R cycles the mode while dragging; the choice is written to softforge.edsnx.drag.conflictMode.
The angle preservation (softforge.edsnx.drag.anglePreservation) keeps 45° legs (default), lets the legs take
any angle, or keeps arcs tangent to the moved copper.
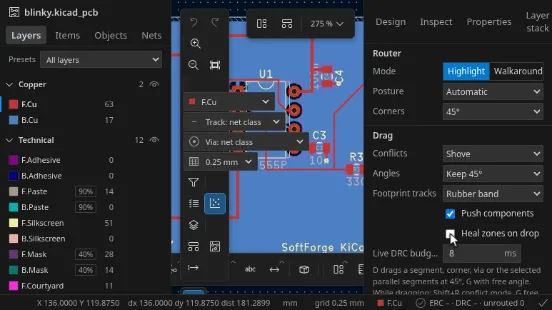
Live checks while dragging. Each frame checks the ghost and the copper it shoved incrementally (clearance, hole,
board edge, courtyard and keepout rules) and draws the markers with the live-checks sprites. The pass has a budget per
frame (softforge.edsnx.drag.liveDrcBudgetMs, 8 ms by default): when it runs over, it runs every other frame and the
status strip says so. The status strip lists the collisions left unresolved by rule. Markers of a drag placed with
violations stay until the next live checks pass.
Zone healing. When a drag is placed, only the zones under the changed copper are refilled, inside the dirty region
(softforge.edsnx.drag.zoneHealing, on by default); islands the move cut off are removed as a full fill would. Healing
never adds copper outside the region: Fill All Zones (B) restores a piece an earlier fill had removed.
Keys while dragging. Shift+R cycles the conflict mode, G switches this drag between free angle and the angle preservation of the setting, and Space cycles the corner posture of the 45° legs (automatic, straight first, diagonal first). R, F and T do nothing to a track.
Drag actions. These start on the selected segment, or on the one under the cursor; they use the same conflict modes and live checks:
| Key | Action | Clip |
|---|---|---|
| D · G | drag a segment, corner, arc, via or bus (45° · free angle) | corners · via · bus |
| Shift+D | drag the collinear run of segments as one | run |
| Shift+G | move every track and via of the net (pad ends stretch) | net |
| Shift+B | break the track at the cursor; the new corner follows the cursor | break |
| Shift+U | convert the segment to an arc tangent to its neighbour (click places it) | arc |
| Shift+T | retrace the run with the net class track width and via size (click places it) | retrace |
| Shift+Y | re-route over existing copper: click the corners of a new path from the track; a click on a track of the net (or Enter) ends it and the old path between the two ends is removed. Backspace takes back a corner | re-route |
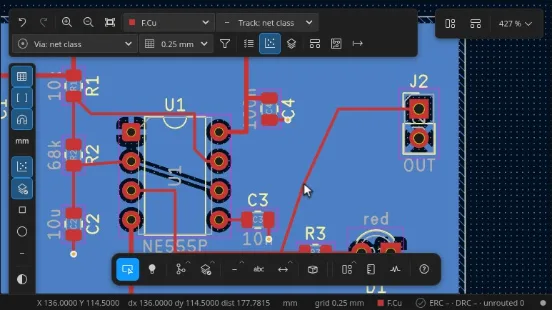
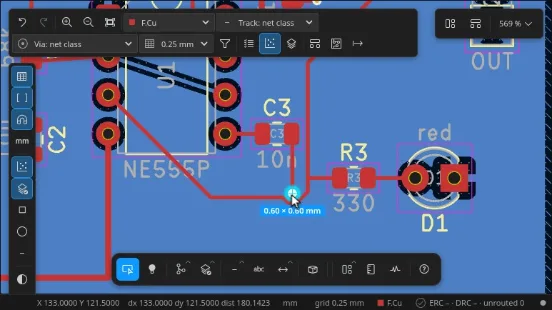
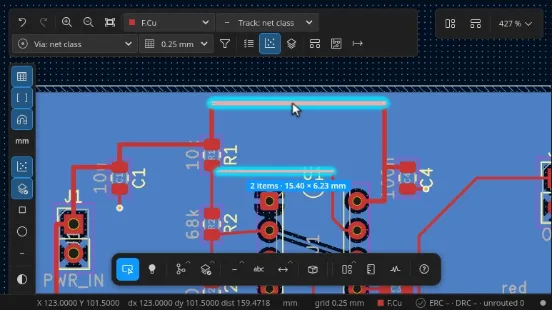
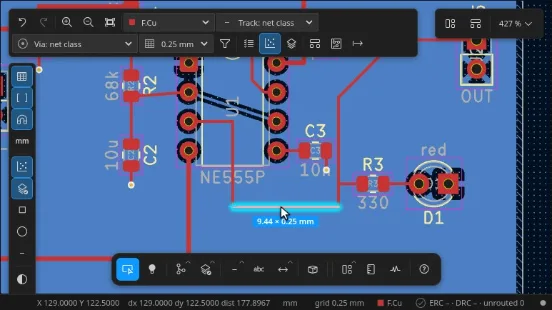
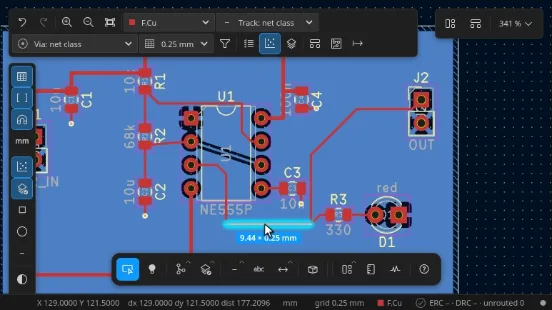
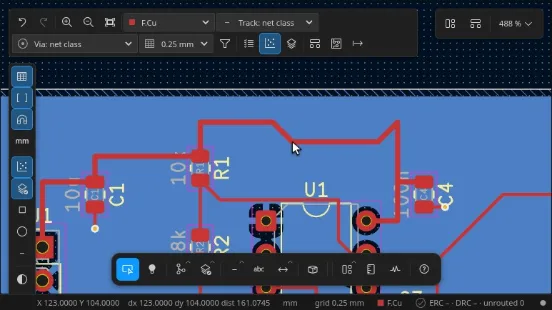
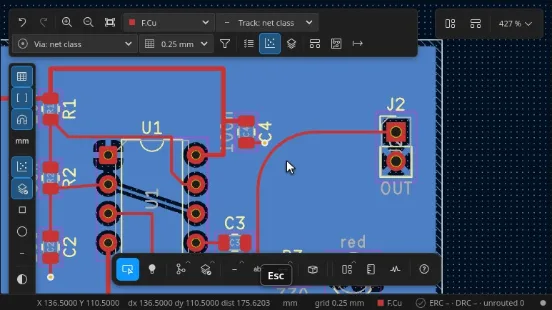
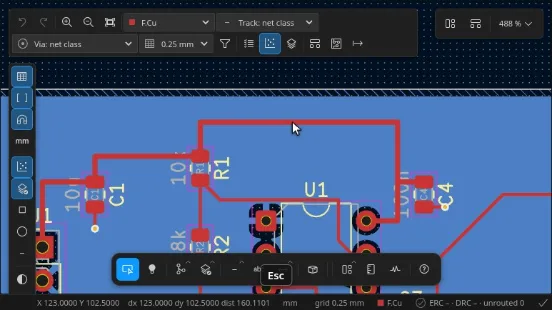
KiCad 8 has no default key for these actions; the keys are listed (and can be changed) in Electronics Designer: List Hotkeys.
Moving a track end and Allegro’s slide are reached through the command pcb.dragSegment (edsnx pcb drag-segment and
the MCP server; see commands), which runs every action headlessly with the same modes.
Routing ▸ Drag (clip) is the one place for a drag’s options: the conflict
mode, the angle preservation, what the tracks of a moving footprint do (Footprint tracks, the attached-copper mode
below), Push components, Heal zones on drop and the live DRC budget, with a button for each drag action above.
The Placement panel shows the footprint settings too; both write the same softforge.edsnx.drag.* and
softforge.edsnx.move.* settings.
On the board, Ctrl+drag does not duplicate (that is the schematic’s Duplicate with connections, see Smart wiring); Ctrl+D duplicates the selected items only.
Differential pairs#
Pairs are found by net name (KiCad’s rule: _P/_N, +/-, P/N, TX0P/TX0N …), by relaxed suffixes
(p/n, pos/neg) inside a diff pair net class, and from an explicit table in the .kicad_pro
(net_settings.diff_pairs, with optional per-pair width / gap / via gap). The Nets tab lists them under
Differential pairs with their gap; click one to highlight it.
6 starts the pair router: click a pad (or track end) of either net; the nearest pad of the partner net is gathered (otherwise the tool asks you to click it). Both traces follow the cursor: an uncoupled 45° lead-in from the pads, then the coupled section with the class width and gap (or the Routing panel’s overrides) and corners that keep the gap. V places a via pair and switches layer (Shift+V toggles side by side / staggered inline; +/−, Page Up/Down pick the layer), / flips the posture, Backspace removes the last segment or via pair. Clicking a pad of either net leads both traces out onto the target pads; double-click, Ctrl+click or End finishes at the cursor. In walkaround and shove modes the pair walks around obstacles as one object. The readout shows the gap, both lengths, the skew and the uncoupled length; gap and clearance violations turn red. When the target pads are the other way round, the pair would arrive crossed: the tool stops before committing and offers the swap. S swaps the two pads of the target footprint (a pin swap: the pads exchange their nets, and the change is back-annotated to the schematic like Electronics Designer: Swap Pins; pads outside a common swap group are swapped anyway, as you asked), then a click on the target pads finishes uncrossed. Enter finishes crossed instead; a click elsewhere drops the offer. When the target pads belong to different footprints nothing can be swapped and only Enter finishes.
D on a coupled segment of a pair drags both traces together and keeps the gap.
Multi-routing (bus)#
Ctrl+Shift+B routes several nets as a bus (Altium’s Interactive Multi-Routing). Selected tracks contribute their free end; click pads or track ends of different nets to add or remove starts, then click where the bus goes. The lines fan in from the starts in their order across the bus (Tab rotates the assignment) and follow the cursor with corners that keep the spacing. , / . or Alt+wheel narrow or widen the spacing, V places a staggered via array and continues on the other layer, Backspace removes the last segment. A line whose own pad lies on its lane completes there; double-click, End, Ctrl+click or a click on one of the nets’ pads finishes and fans every open line out to the nearest pad of its net. The whole bus is one undo step.
D with the multi-route tool active and nothing picked drags a routed bus: point at (or select) one of its tracks; the parallel tracks of other nets beside it on the same layer (one per net, the gaps no wider than four track widths plus 1 mm) move together with the drag engine’s bus drag, so the pitch is kept. Selecting the tracks yourself and pressing D does the same with exactly those tracks.
Fan-out, via stitching and via fences#
- Fan-out (Route flyout): select footprints (or click one) to open the Fan-out dialog: dog-bone or via in pad, direction (auto, diagonal between balls, outward, inward or a fixed direction), escape length, via size and track width (from the net class by default). The preview shows the tracks and vias and marks skipped pads in red with the reason (other-net copper, keepout, courtyard, board edge, already routed). OK commits one undo step.
- Via stitching: select a copper zone (its outline and net are used) or click the corners of a polygon; the dialog sets pitch, grid or staggered pattern, via size and net, and previews the vias, which keep clear of other-net copper, keepouts, courtyards and the board edge.
- Via fence: select a track chain (or click tracks, Shift+click adds, or draw a path on empty board), then Enter; the dialog sets pitch, offset from the track and one or both sides.
Gloss and teardrops#
Gloss (Ctrl+Alt+G, the Route flyout, or Electronics Designer: Gloss Tracks…) cleans up the selected tracks or the whole board: it removes zero-length and duplicate segments, merges collinear ones, trims short dangling stubs and redundant loops, chamfers 90° corners and can run the router’s optimizer over each run. The dialog counts and previews the changes before Apply (one undo step); Enter applies, Esc closes.
Electronics Designer: Teardrops… adds KiCad teardrops where tracks meet pads and vias (and optionally where a narrow track
meets a wider one): length and width ratios with their limits, curved sides, a minimum length and the
“track width / pad size” filter, for the whole board or the selection. Apply regenerates them, Remove deletes
them. They are written as KiCad teardrop zones (with their fill), so KiCad and the DRC see the copper.
Regenerating after an edit replaces them (never doubles them). KiCad 10’s kicad-cli pcb drc checks them clean and
keeps them when it rewrites the file; its zone refill (--refill-zones, or Fill All Zones in KiCad) regenerates
teardrops from the pads’ and vias’ own teardrop settings, which the editor does not write yet, so a KiCad refill
removes them until you regenerate them here.
Controlled impedance#
Board Setup ▸ Constraints ▸ Impedance computes the characteristic impedance on the board’s stack-up: pick a copper layer (outer layers are microstrips, inner layers striplines; εr, dielectric heights and copper thickness come from the physical stack-up and stay editable) or a coplanar line (CPW, CPWG). Enter a width to read Z0 and Zdiff, or a target Z0 / Zdiff to solve the width or the pair gap; Apply to net class writes the track width or the diff pair width and gap into a net class.
Length tuning and matched groups#
7 tunes a single track, 8 a differential pair’s length and 9 its skew (the shorter trace grows to its partner). Click a straight segment and move along it: a meander (accordion), trombone or sawtooth pattern grows from the click to the cursor until the length reaches the target, and the readout shows current / target / Δ. Click or Enter commits (one undo step), Esc cancels. A run that turns corners is tuned as one chain: the pattern spreads over every straight leg between the click and the cursor, kept a pattern’s amplitude plus its spacing away from each corner so the legs’ patterns never meet, the length shared in proportion to what each leg can take. 1/2 change the spacing, 3/4 the amplitude, S the style, R 45°/round corners, Ctrl+L all of them; the Routing options panel holds the defaults. Patterns get lower where they would come too close to other copper.
The target comes from the net’s matched group. The Length panel (right side) lists the groups: create one
from the selected tracks (nets of a pair are added as the pair), set the target (the longest member or a fixed
length), the tolerance, a max skew, and for pairs a gap tolerance and a max uncoupled length. Each member shows
its routed and estimated (routed + ratsnest) length, the delta, a bar against the target band and its status;
click a row to select its copper, Tune to start the tuner on it, Tune all to pattern every short member
at once. Groups are saved in the .kicad_pro and written to the rules file as LM: … rules, so the live DRC and
kicad-cli pcb drc report length_out_of_range, skew_out_of_range, diff_pair_gap_out_of_range and
diff_pair_uncoupled_length_too_long. A member restricted to a pin pair (U1.3 → U2.7, an xSignal) is written
with KiCad 9/10’s pad-path condition, A.NetName == 'n' && A.fromTo('U1-3', 'U2-7'), so KiCad measures the
pad-to-pad path; the rule reads back as the same pin pair. The built-in live DRC measures such a member on the
whole net. Lengths include via barrels between the layers actually used (from the
stack-up) and pad-to-die lengths, as KiCad counts them.